Tampilkan postingan dengan label textures. Tampilkan semua postingan

Selasa, 01 Maret 2016

Create a Seamless, Tileable Texture

Completed wood texture

The following 10 step process can be used to create textures for games, website backgrounds, graphic design work as well as to create textures and materials for 3D design applications such as Artlantis, AutoCad 3D or Revit. 3D games engines also make their textures in the same way so you can also use this tutorial to create textures for UE4, Unity, CryEngine or L4D.

1. Find a good image - flat, straight on, not patchy,  etc. See good and bad examples below.
Bad Image for a texture - not flat/straight on
Good Image for a texture - straight on with no patchy areas

2. Open image in Photoshop, crop the image to keep only the area you want and resize to a size to the power of two, best options are 128, 256, 512 ,1024 - square or rectangular. For example 512 x 512 pixels or 256 x 512 pixels.


3. Go to filter->Other-> Offset. Input a horizontal and vertical value of half the image sizes you set in step 2. So if your image is 512 x 512 pixels set the horizontal and vertical offsets to 256 pixels. What this does is take the central areas of the image and move them to the edges thus meaning the texture will line up perfectly with itself when it is 'tiled'. However, on the other hand it also leaves an unsightly, messy looking area over and across the image; this is what we need to fix next.

4. 
Use the clone stamp tool (alt + click to define a source point then click to clone from that point, brush will show a preview in newer versions of Photoshop) to remove the lines or fix the messy area left by the offset. Tip: use as large a brush size as possible, around 1/5 the size of the image and a hardness level between 0 and 25 for unpatterned textures such as soil, sand, grass etc. and between 25 and 50 for patterned textures like bricks, tiles etc.
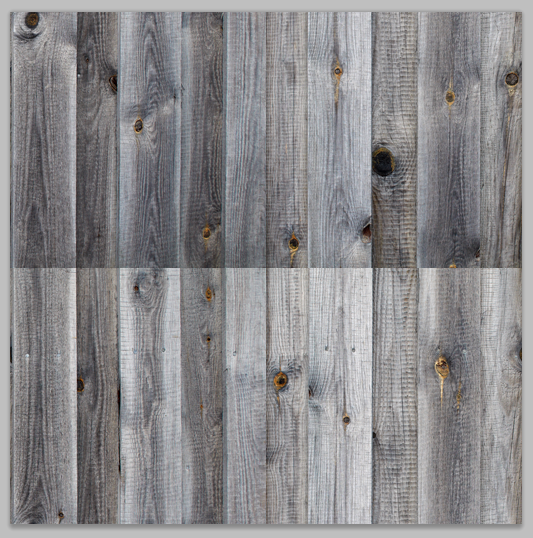
Texture before cloning began - obvious lines
Texture after cloning - lines gone but blurry areas
5. Use the sharpen tool to fix any blurring that the clone stamp tool may have caused.

Texture after sharpening - blurred areas gone
6. Add a hue and saturation adjustment layer and set saturation to"-100". This will show up any patchy areas or obviously variations in light and dark within the image. These will need to be softened or else the texture will have recurring patchy areas when tiled.

7. To fix any variations in light and dark first use the dodge tool, targeting shadows, to lighten any overly dark areas. Next use the burn tool, targeting highlights, to darken any overly light areas.

Before use of dodge and burn tools - some patchy areas
After dodge and burn - more consistent hue
8. Now use any of the image > adjustment tools to add or change the colours or intensity of the texture, or in this images case add colour to the planks to match the knots in the wood.

Texture after colour has been added using the image > adjustment s tools
9. Now test how the textures 'tiles' on a canvas double the height and width of the texture. For example create a 1024 x 1024 size canvas to 'test tile' a 512 x 512 size texture. Duplicate the texture until you have 4 of them and line them up to fill the canvas. Are there any obviously repeating patterns? if so return to the texture to fix it - if not save the texture file.
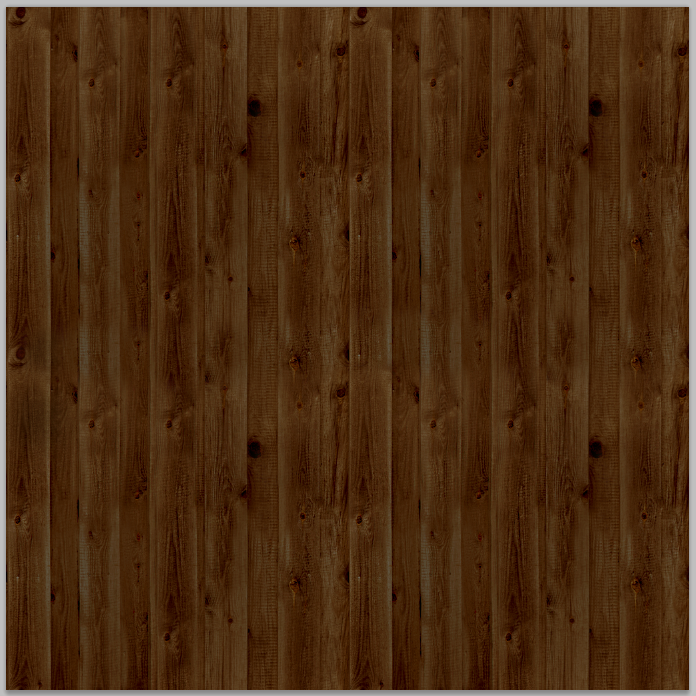
4 textures 'tiled' side by side - no obvious seams or patches
10. 

To save the texture, go to file > save as and select .TGA file (truevision targa) and then choose the 32 bit option when prompted. Congratulations you have just created a seamless, tileable texture.

If you are using the texture in a 3D application then there is a little more work. For almost all 3D applications a the texture you have just created is still incomplete. A 'normal' file or 'heightmap' for the texture is still required. The quickest and easiest way to do this is using an application called CrazyBump.

Use crazy bump to create the 'normal' and if necessary (depending on the application you need the texture for) the occlusion, specularity and displacement files too. Once again save the files as .TGA (truevision targa) and choose the 32 bit option.


Baca selengkapnya

Kamis, 21 Januari 2016

Creating a Room in Blender

Creating a Room in Blender
Final Render of a basic room in blender


In Blender, we use rendering to complete the creation of our 3D scenes and objects. It is used to showcase the scene with all applied textures, materials and lighting, in order to give it the realistic appearance we aim for. We used this process to complete work with the highest standard possible.


In this tutorial, we will be focusing on the actual rendering of the scene. To begin, I will create a room scene, and ensure that the lighting is correctly added, as well as the materials and textures to each object. I will provide a walk-through on how I go about creating this room scene.


Step 1: Making the Tabletop

My scene will mostly be made up of planes, which can be added by pressing shift + A. The plane is located in the ‘Mesh’ dropdown. For this tutorial, I started with a table, and scaled it (S) by 2. Then lift the table on the 'Z' axis, by pressing the 'G' key, then 'Z', then type '2.5'. This will lift the plane higher and give room for the table legs. 

Added Plane
You may want to extrude the tabletop, so as to make it thicker as well. To do this, select the table and enter edit mode (tab). Ensure that Blender is in 'Face Select' (located at the bottom of your screen), and extrude the tabletop (E). You can make it as thick as you want it to be by entering a number after pressing 'E'. My tabletop is '0.1' extruded.


Extruded Tabletop

Step 2: Making the Table Legs

Once we have scaled the plane, go into edit mode (tab) and ensure that the 'Face select' is on (located on the bar at the bottom of the screen). Once you're sure it's on, I would advise using Isometric view by pressing 5, then pres Ctrl+7 to view the bottom of your object, then click subdivide (located on the left in edit mode) three or four times, depending on how wide you want the tables legs to be.


Scaled plane in edit mode

Subdivided plane, with corners selected

Once you have finished subdividing the bottom of your table-top, press shift + right-click each corner face. You can then extrude (E) these faces and in doing so, create your table legs.

Extruded table legs

Step 3: Making the Table Cloth

You can then add a table cloth over the top of the table. In order to do this we must simply add another plane, and scale it up. For this tutorial, I scaled mine by 3. Then grab it (G), and bring it up over the table. You can do this by pulling it up by the blue arrow on screen also.


Cloth plane added
After you have moved the cloth, go into edit mode (tab) and click 'Subdivide' around 5-6 times. This will divide the plane's faces, which will play an important role in giving it the fabric-look we want it to have. Go into the 'Physics' tab on the right hand side of the screen.


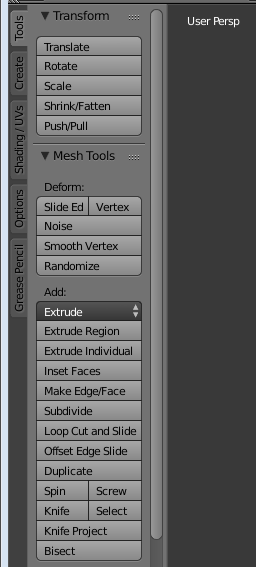
Edit Mode Menu
Cloth plane subdivided

Cloth Physics
Add the 'Collision' and 'Cloth' physics to the object. You should then select the table and enable the 'Collision' physics for that as well. These physics allow the cloth to fall onto the table and register the table as something to make contact with in the scene.


Once this is done, select the 'Play Animation' button at the bottom of your screen (or use Alt + A). You should see the table cloth you had previously created drop onto the table and take the appearance of a realistic piece of fabric.


'Play Animation' - Middle-Right play button

You may notice how the cloth may still look slightly unrealistic, as shown below:


Unrealistic Cloth

To fix this, simply select the cloth and select the 'Smooth' button underneath the 'Shading' dropdown on the left hand side of the screen.

Shading Settings
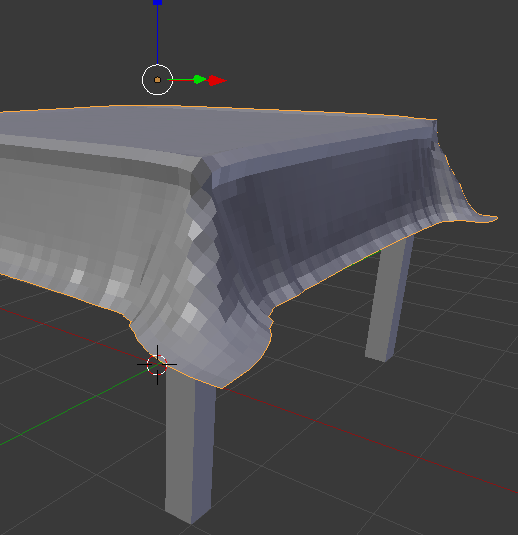
The fabric will then appear as shown below, which is much smoother and realistic:


Realistic, 'Smooth' cloth

Step 4: Making the Floor

Once the physics have been applied to the table cloth and table, you can move onto making the actual room. This requires only three planes, each scaled up to represent the walls and the floor.

Added Floor
Add your first plane. This will be the floor of the room. In my own scene, I scaled it by 10. It's far easier working with even numbers when creating room scenes. 


Scaled Floor

Step 5: Making and Moving the Walls

Once you've scaled the floor, you need to add two more planes for the walls. Again, add a plane from the 'Mesh' menu. Rotate it on the 'X' axis ('R', 'X') by 90 degrees. Then proceed to move the plane along the 'Y' axis by 10. It should appear as follows.

First wall moved
The next step is to scale the wall to fit along the floor, and make it taller. To scale it to fit the floor only, it's important that you only scale it on the 'X' axis. This will increase the length of it only. Do this by pressing the scale key (S), then 'X', and finally scale it by ten. Then proceed to do the same again, except on the 'Y' axis and by 5. You should then grab the wall, and move it up on the 'Z' axis until the bottom of the wall is in line with the floor (follow this sequence for accuracy; 'G', 'Z', 5)

It should appear as follows:

First wall scaled
After you've finished this, you need to repeat the process of creating a wall, only this time, things should be done the other way around. Add your second plane, and rotate it on the 'Y' axis this time. Then move it on the 'X' axis by 10. 
It should appear as follows:

Second wall moved

Then proceed to scale the wall on the 'Y' axis, by 10. Again, you will see that this will make the plane as long as the floor. Make this wall the same height as the other by scaling it on the 'Z' axis, just as you had done before, and move it up on the 'Z' axis by 5.

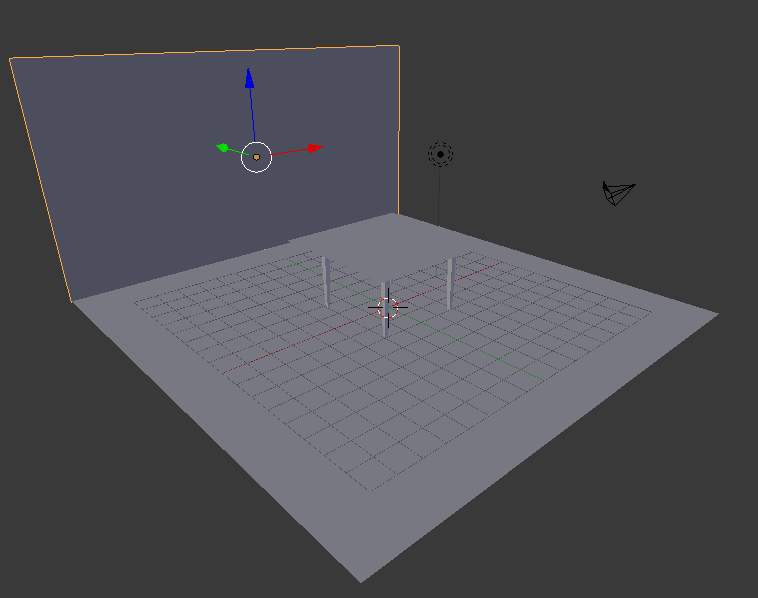
It should look like this:

All walls added

Step 6: Adding Materials and Textures

Once you've finished the room, you will probably want to add materials and textures. To do this, you must select each object and add a material to each. This can be done in the materials tab on the right hand side of the screen, as shown below:


Materials tab highlighted
Texture Tab highlighted


In this tab, select the 'New' button. This will give the object a material. Materials have to be added to an object in order to use textures to make the object appear more realistic.


After the material has been added, proceed to the Textures tab, which is directly to the right of the materials tab. Then select the 'New' button, and use the 'Open' selection under the 'Image' dropdown to open whichever texture you wish to use from your computer. Do this for each object.

If you were to select the 'Rendered' view now, you would see the room with all it's textures and materials added to each object, however, you may notice that each object may an unrealistic shine to it - depending on where your lamp placement is. If you want to get rid of this and produce a more realistic scene, simply select an object, go onto your 'Materials' tab, and turn the 'Intensity' under 'Specular' down to zero. This reduces the shine of the objects in your scene. You will need to do this for each object.

Specular in Materials Tab

Step 7: Lighting

Before you complete your final render, you may want to change or alter the lighting in the scene. For this tutorial, I used a 'Sun' light, which is a light that does not originate from a certain point, but simply from the sky in Blender. It acts as general sunlight, and can create shadows, which is the reason I did not create a roof on the scene.


Sun Light


You may want to experiment with your own lighting, by selecting the lamp and trying out the different options.

Step 8: Final Render

Finally, we can render our scene. To render the scene, press 'F12' on your keyboard. This will give you a rendered view through the camera on your scene. If the render is not centering at the point in which you want it to, you can move your camera around on the 'X', 'Y' and 'Z' axis'.


Camera selected and moved


Once you are satisfied with your camera placement, you will end up with a final render that you feel is the best, probably something like the following:


Final Render


Final Render 2


Final Render 3


Baca selengkapnya

Kamis, 05 Maret 2015

How To Create A Tileable Texture

Tillable Texture
This image shows a finished texture that can be used in a game.

Steps To Create The "Diffuse" Texture


1. Search for an image that will be suitable for your game and an image that you want to be your tileable texture. the best website is http://www.textures.com/

2. Put an image that you want to be your texture in to Photoshop software.

Brick Wall
This image shows the brick wall.

3. Crop the image, removing any potentially troublesome areas.

Crop Image
This image shows Crop tool has taken away part of the image.

4. Then resize image to be power of 2.

Image Resize
This image shows the Image size setting in power of 2.
5. Press filter on top software tool bar than select other option and then select offset.

Offset
This image shows the right setting for offset.

Offset divide image
This image shows an image that is divided into two parts the better one in on top and the bad one is on bottom of the picture. The bottom part will be covered with clone tool.

6. We will use clone tool to copy good parts of image.

Clone
This image shows that the clone tool created a copy of the top part of the image.
7. Use Sharpen tool to get rid of the blur but do not over use Sharpen tool because we get bad effect.

8. Use dodge tool to make shadows lighter and burn tool to make highlights darker.

Dodge
This image shows how you can make image brighter by using Dodge Tool.

Burn
This image shows how you can make image darker by using Burn Tool.

9. On tap bar go to Image\Adjustment\Hue and Saturation.Add Hue and Saturation adjustment the way that you want to make this texture more interesting. Make sure that there is not any defects.

Hue & Saturation
This image shows settings for Hue and Saturation Adjustment.

10. If everything is good and you are happy of effects save as targa file. You should save your targa with a resolution of 32 bits/pixel.

A finished texture
This image shows a finished texture that can be used in a game.

Steps To Create The "Normal" Texture

1. Search in Google for NVIDIA texture tool the best way to find it is: “NVIDIA Texture Tools for Adobe Photoshop”. If you cannot find there is a link for website where you can download NVIDIA plugging tool.

https://developer.nvidia.com/nvidia-texture-tools-adobe-photoshop

2. Press download and chose version of Windows that you work with either 32 bit or 64 bit.

3. When download is finish just install the program.

4. Open Photoshop and check in NVIDIA installed right be pressing filter and down in list should be NVIDIA Tool.

5. Open your texture targa file.

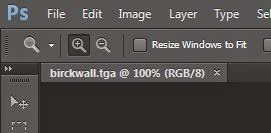
This image shows the file name and format that is saved.
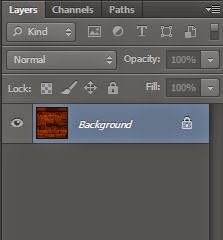
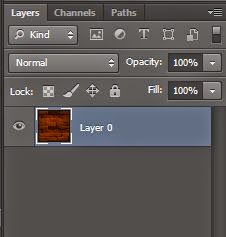
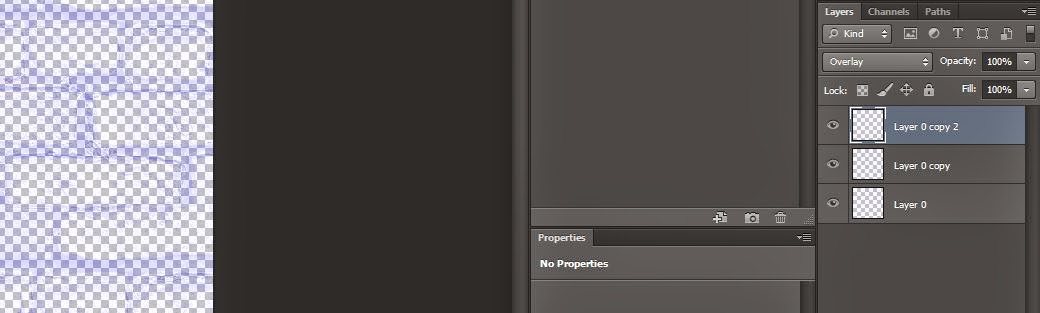
6. Unlock layer so you can work with NVIDIA Tool.

This image shows layer blocked.

This image shows layer unblocked.
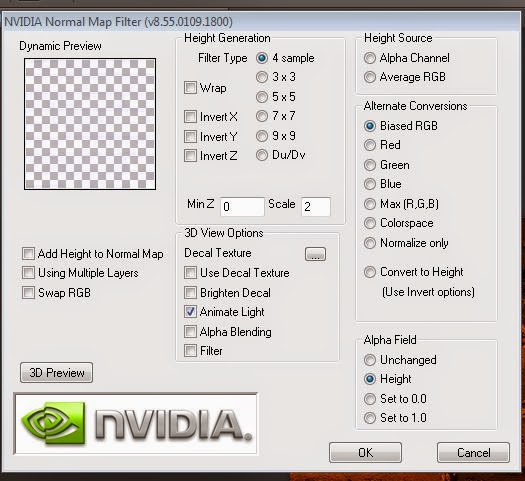
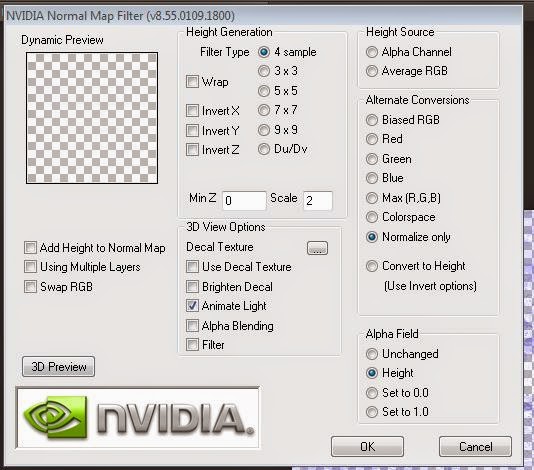
7. Go to filter and select NVIDIA Tool and take “NormalMapFilter” option.
This image shows setting of NVIDIA Tool.

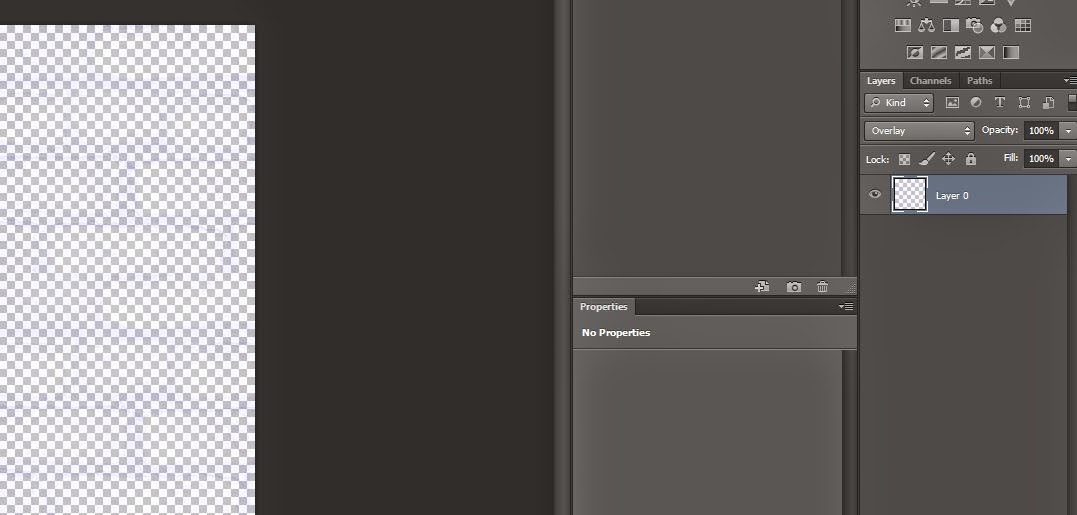
This image shows some effect that we can get from NVIDIA Tool.
8. Duplicate the layer until you get effect that you want.

This image shows Duplicate layer which give better effect.

This image shows last step that you should take after last duplicate layer.

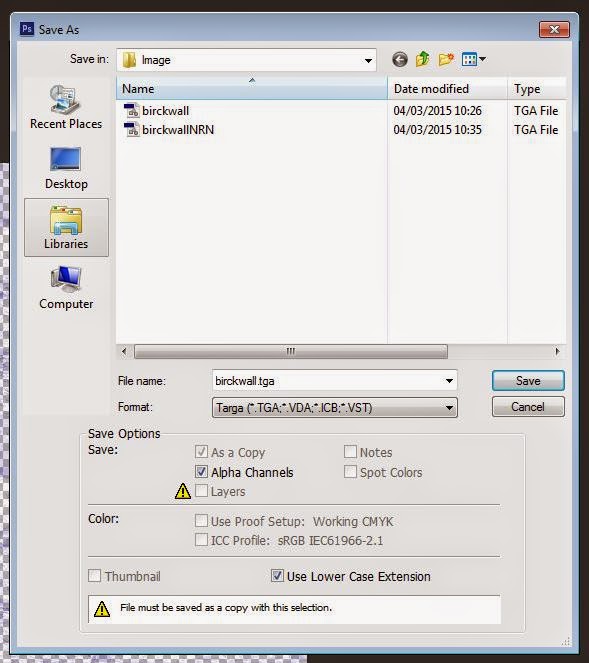
9. If you are happy of yours effect save in targa(tga) file.

This image shows saving mode.


This image shows a finished texture that can be used in a game. The texture is in targa(tga) file.


This image shows right format that you can save your targa format and it shows the resolution that you can chose the best options is 16 bits/pixel and 32 bits/pixel because is the power of 2.

This link shows Video Tutorial about how to install NVIDIA Texture tool and how creating Tillable texture.

The Next Step

Now that you have created the texture the next step is to import and add them to whatever software you need them for.


Baca selengkapnya