|
| An edited curve |
What are curves within Blender?
Curves within blender are normally used to create the outline of an object or trace over something e.g. a picture. It is similar to the pen tool in Photoshop as to how it works and what it’s used for. There are two types of Curves, Bezier and Circle.
How to use the Curve tool
In this tutorial I will be drawing a Batman logo to show you how to use the Bezier Curve.
Step One:When you are ready to add your curve in to the stage, go into Orthographic view (numpad 5) and top down view (numpad 7) and delete the default box by right clicking it and pressing x then clicking delete. Then press shift+A> Curves>Bezier Curve and you will see the following:
 |
| newly added curve |
This is your curve. It cannot be edited or re-shaped until you go into edit mode by pressing TAB. Once there you should see this:
 |
| handles on curve |
The layout the curve is in can look quite complicated and the arrows tend to throw people off. If you’d prefer to turn them off press N then in the new menu that appears, under “Curve display” un-tick normal as shown below and the arrows will disappear.
 |
| getting rid of normal |
Step Two: To change the shape of the curves you use the handles which are the red straight lines coming from the points. The points between the two red handles, on the curved line are where the curve's control points are. These points can be moved to change where the curve actually is. The red lines can be adjusted in length and position. The length changes how big the curve is and the position changes the direction. Play around with the handles a bit to get used to them.
 |
| adjusting the handles |
Step Three:If you practised step two you will notice that when you change the position of one handle, the other handle stays in line with the one you changed. This is because of the handle type. To change this press V and click on vector and you will notice the handles go green and can be adjusted freely.
 |
| vector handles |
The vector handles are necessary to create shapes where the curves on either side of a point go in different directions e.g. the Batman logo wings as seen below. To add a new point, right click the point you want it added on to, and press E (for extrude). You will then notice you are dragging a new point. Place it in a suitable location and adjust it how you want.
 |
| adding a new point |
Continue this process until you have the shape you want. If the shape you want to make is symmetrical, you only need to draw up half of the shape. To see the shape without handles, go back into object mode using TAB. To continue editing, press TAB again.
 |
| how to see your shape |
Step Four:If the shape your drawing with your curves is symmetrical then you will need to duplicate it, then mirror it. To do this get out of edit mode into object mode, press Shift+D then enter and then press CTRL+M+X then enter. Reposition it if it is off.
 |
| mirroring your shape |
This has given us two different Bezier curves which can’t be edited at the same time. To change this go into object mode, right click one so it is highlighted as above, then Shift right click the other and press Shift+J to join them. You can then TAB back into edit mode. Here you can right click one point, then shift right click the corresponding one on the mirror side, and press F to connect them (stands for fill).This is how I connected the head above and the tail below.
|
| finished shape |
When you connect the two points at the bottom for the tail, you need to add a new point in the middle to drag down. To do this click subdivide in the left toolbar after you connect them by pressing F, as shown below:
 |
| subdividing your curve line |
Step Five:We now have the outline of our shape finished but now we can make it more detailed, or turn it into a rendered image. This last step is not necessary, but it is good practice and turns the curve into a nice image.To begin this process we have to click the curves tab in the right toolbar and change it to 2D to fill the shape in. make sure you have the curve selected to get the curve tab to show. you can also change the resolution to 24 to give it more definition.
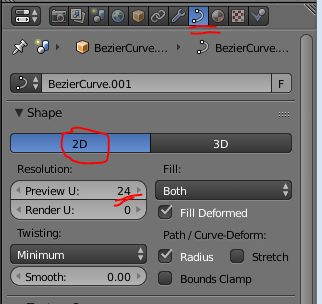 |
| making your curve solid |
You can then go to the top of the stage to where it says blender render and change it to cycles render. After that, click the world tab (you must have nothing selected. Press A while over the stage to deselect if you have anything selected) in the right toolbar to get the menu below displayed.
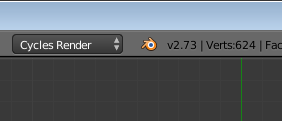 |
| making your curve an image |
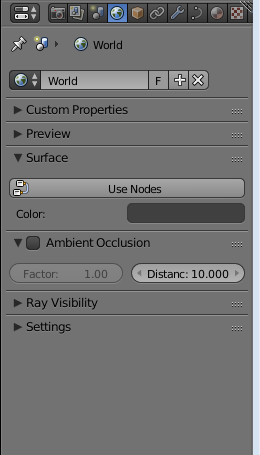 |
| changing colour of background |
In this menu go to surface and change the colour to what you want the background of the image to look like. I chose black.
You can then right click the curve and click the material tab in the same area where the world tab was. Add a material by clicking the add material button then go down to surface. change the surface to emission, then pick the colour you want to use.
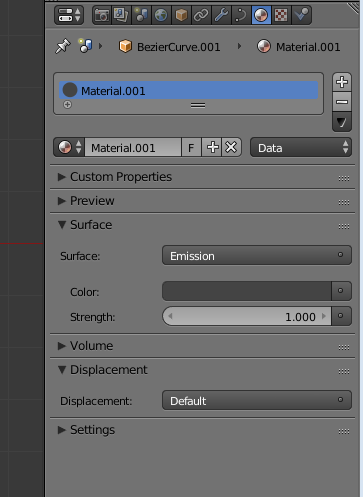 |
| changing colour of curve |
Finally, position your view of the image to wherever you want the camera to be. I recommend using a top down view (numpad 7). You then press CTRL+ALT+Numpad 0 to set the cameras location. You can press numpad 0 again to exit out of the camera view. Right click the camera then click the camcorder tab in the same place where the world and material tabs were. Change to Orthographic and use the Focal Length and the Shift options shown below to reposition the camera. To view these changes press numpad 0 over the stage again to show the view. It will update to the changes you make in real time.
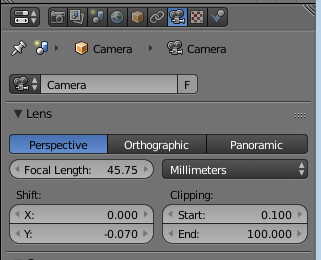 |
| taking a picture |
Once you’re happy with the position of the camera and the other settings you have made, click the camera tab and then click render, or just hover over the stage and press F12 to take a rendered image of your curve. As you can see below, I have a fully finished rendered image of my custom made batman logo.
 |
| final image |