Tampilkan postingan dengan label Unreal Engine. Tampilkan semua postingan

Sabtu, 13 Februari 2016

UE4 Enemy AI

This tutorial is the eight in the 10 part series on how to create a first person shooter game using Unreal Engine 4. We recommend you read the previous articles first to get the maximum benefit from this tutorial. In this tutorial I will be showing you how to make a simple enemy A.I to track and move towards the player.

Step 1

Start unreal engine and open your level right click on your content browser and make a new folder, mine will be called ZombieAI and within that folder right click and create a new blue print, use the search function to type in AIController as the blueprint class and click select it to create the blueprint. Name the blueprint ZombieAI and click 'Save All'.


Step 2

Double click the ZombieAI blueprint and open the event graph tab. You can delete the event tick as we wont be using it. Then right click and search for add custom event once you place it you have to name call it TrackPlayer.


Add a custom event and call it TrackPlayer

Then right click and search for AI move to and connect the white arrows together.


Connect the TrackPlayer event to the AI Move To node

Then right click and search for get controlled pawn connect the blue arrow to the pawn on the AI Move To. Then right click and search for get player character and connect the blue arrow to the Target actor on AI Move To.

Connect up Get Controlled Pawn and Get Player Character to the AI Move To node

Next, beside the Event begin play right click and search for set timer by function name and connect the white arrow of the event begin play to the set timer and in the function name section type in TrackPlayer change the time to 1 and click the looping option then hit compile and save.

Connect EventBeginPlay to a Set Timer by Function Name node

Step 3

Now go back to the ZombieAI folder, right click and create a new blue print this time chose the character class and call it ZombieCharacter. Double click it to open it up and in the class default details section under pawn change the AI Controller to the ZombieAI that we just made.

Change the AI Controller to ZombieAI

Then while in the components window, under the capsule component, click on the mesh and change the skeletal mesh to the zombie mesh we imported in the last tutorial. 

Select the Mesh

Change the skeletal mesh to the zombie mesh imported in the previous tutorial

Be sure to move it down until its feet are at the bottom of the capsule, then double click the capsule and change the height in the settings to 110. Finally, click the rotate tool and rotate the character until it faces the same direction as the blue arrow.

Move the mesh so it's feet line up with the bottom of the capsule

Step 4

Now, in the components window, click on the character movement component and change the max acceleration to 1024 and the max walk speed to 375 as its default speed it way too fast.

Change the settings of the character movement component


Step 5 

Finally under the animation section of the character mesh, select the animation blueprint we made in the last tutorial (ZombieAnimation) and hit compile and save.

Change the animation blueprint

Just one move thing needs to be done so that our AI character will chase after the player and that is to add a Nav mesh. You can find the Nav mesh in the volumes section of the Place tab. 

Find the Nav Mesh in the volumes section of the Place tab

To put it in the level just drag and drop it into the level and re-size it to cover the area you want your AI to move in. You can hit P to highlight the area the nav mesh covers.


The green area shown is the navigable area of the AI created by the Nav Mesh

After you have done all this you can just drag your AI character into the level and when you hit play it will chase after the player.

As you can the zombie was put in the main game and now coming after you. Now its your turn to do this in your game.


Next Up

Now that the enemy AI is set up we can shift our attention to the game UI Screens, starting with the game Start Screen (menu)!


Baca selengkapnya

Jumat, 29 Januari 2016

UE4 Terrain and Landscape

This tutorial is the second in the 10 part series on how to create a first person shooter game using Unreal Engine 4.

Creating The Terrain

Go to 'Contents Browser' and select 'Add New' and choose 'New Level'


UE4 Terrain and Landscape

  
Select level and in ‘Modes menu’, select ‘Landscape’ and your view-port should look like the following:


In the ‘Modes’ panel, select the landscape mode and adjust its settings to the following (15 x 15 quads is large enough for the first level), then select ‘Create’


Editing The Landscape (Terrain)

1   When a landscape is created the following options panel should appear under ‘Landscape Mode’

You can edit your landscape you can choose from three edit modes. These three modes are:
  •         Manage Mode
  •      Sculpt Mode
  •         Paint Mode (This will be covered under the Materials and Textures tutorial)


Manage Mode – Create new landscapes, Modify an existing landscape, Select components (building blocks/grids of landscapes) and modify their properties in the Level Editor’s Details Panel

Selection – Selects a section (Block) of the landscape

Add – Adds a section of landscape to the current Landscape and can add a number of blocks based on the value of the brush size

Delete – Completely removes a section of the landscape


Move Level – Moves any selected components to the specified streaming level

Change Component Size – Changes the size of components and the size of the landscape according to the settings


Edit Splines – Ctrl + Left Click on the landscape will place a node for a spline. If a node is selected and there is another node placed, this tool will connect the two nodes and if there are no nodes selected then a new node will be placed


Sculpt Mode – Allows you to mould the look of your landscape height map


1. Sculpting Tools – Sculpts the landscape with various tools.

 2. Brush Tools – Modifies the appearance and effect of the brush that is used when you are painting or sculpting the Landscape

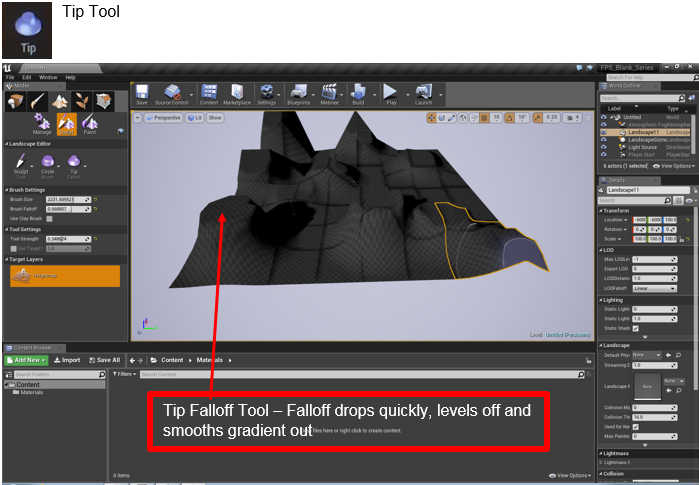
3. Falloff Tools – Modifies how your brushes falloff


Sculpt Tools


 Retopologize Tool
Similar to the smooth tool but it pushes and pulls triangles to smooth the transition of the landscape and try and keep the basic form of the terrain which minimizes change to the height of the landscape. This tool makes the project slower to render and should only be used if really needed.

Visibility Tool
Used to create holes in the landscape for things such as caves. For this tool to be visual, the landscape must have a material/texture on it. This tool will be covered in more detail in our ‘Textures and Materials’ tutorial.

Region Tools


Brush Tools


3. Falloff Tools


Our Level Landscape

This is the landscape we created for our First Person Shooter Game using the above tools

Next Up

In the next tutorial we will show you how to create the textures and materials for the FPS game level


Baca selengkapnya